

Post-Blemish Marks
- A post-blemish mark is a color trace without texture; a scar, on the other hand, is felt to the touch and requires a dermatologist's attention.
- Two very different families: red or pink marks and brown marks. The diascopy test — five seconds of pressure in front of a mirror — distinguishes them.
- The most important step is not a serum: it's daily sun protection, 365 days a year, including winter and behind a window.
- Our 90-day protocol requires only one change at a time and three comparable photos: D0, D30, D90.
- No cosmetic product can erase a mark. It supports the skin's appearance while the body does its work at its own pace.
The blemish is gone, the mark remains
This is a common sequence: the blemish has cleared up, everything feels smooth to the touch again, yet a colored mark still indicates the exact spot where it was. On the cheeks and forehead, these post-blemish marks often end up taking up more space in the mirror than the blemishes themselves — because they last longer, and because we don't know what to do about them.
This chapter of the Academy is for exactly that: to give you a framework for understanding. To know what type of mark it is, what maintains it, what cosmetics can reasonably support, and when to stop buying products and see a healthcare professional. We don't promise erasure here: we explain how to work on the visible uniformity of the complexion and skin comfort, which is the true domain of cosmetics.
First, a clarification of vocabulary, because it determines everything else.
A mark is not a scar
In common language, " acne scars " refers to anything that remains after a breakout. In reality, two very different phenomena are hidden behind this word, and they do not call for the same actions or the same specialists.
- The colored mark (or post-blemish mark). The surface is perfectly flat. Run your finger over it: nothing catches. Only the color differs from the rest of the face. It's a difference in pigment or local vascularization. This is the subject of this page, and this is where cosmetic care and sun protection play a useful role.
- The textured scar. There is a raised or sunken area: a hollow (ice pick, boxcar, or rolling scar) or, conversely, a small bump. The structure has been deeply modified. No cosmetic can fill it. This is a medical issue, to be discussed with a dermatologist.
This distinction is not a purist's detail. It avoids two costly errors: spending months on serums for a texture that no cosmetic will change, or conversely, worrying and seeking urgent consultation for a colored mark that is following its natural course.
Two ten-second tests in front of the mirror
Before buying anything, do these two things. They cost nothing, take less than a minute, and will guide everything that follows. Do them in daylight, near a window, without makeup.
Test No. 1 — Diascopy
Press on the area for five seconds, either with your index fingertip or with the edge of a transparent glass, then release and observe immediately.
- The mark fades or disappears under pressure → vascular component: the color comes from small dilated blood vessels beneath the surface. This is called post-inflammatory erythema, often abbreviated as PIE.
- The mark does not budge → pigmentary component: the color comes from a localized excess of melanin. This is called post-inflammatory hyperpigmentation, abbreviated as PIH.
- It fades a little without disappearing → both coexist. This is common, especially on darker skin tones. The program will need to cover both aspects.
Test No. 2 — Stretching
Gently stretch the epidermis between two fingers, from either side, and look at it in glancing light (from the side).
- The area becomes perfectly flat and only the color persists → you are indeed dealing with a post-blemish mark. This page is for you.
- A hollow or raised area remains despite stretching → there is a textured component. Make a note of it, don't treat it with increasingly strong exfoliants, and talk to a dermatologist: they are the one who has the appropriate options.
Red or brown: two families, two strategies
The most common confusion is applying an "anti-spot" protocol to a red discoloration, or a soothing protocol to a brown discoloration. Here, column by column, is what separates them.
| Observable Criterion | Red / Pink Mark (PIE) | Brown Mark (PIH) |
|---|---|---|
| Color | Pink, red, sometimes purplish | Beige, brown, grey-brown, sometimes slate-colored |
| Diascopy Test | Fades significantly, then color returns | Does not budge |
| Physiological observation | Superficial capillaries still dilated at the site of the blemish | Localized excess of melanin deposited in the epidermis, sometimes deeper |
| Most often affected phototypes | Mainly I to III (fair to intermediate skin) | Mainly III to VI (intermediate to dark skin) |
| UV Sensitivity | Moderate: heat and UV temporarily intensify the red appearance | Strong: each unprotected exposure darkens the mark and prolongs healing |
| Texture to the touch | None | None |
| Program Priority No. 1 | Reduce aggressions: fewer active ingredients, less friction, more comfort | SPF 30 to 50 every morning, without exception or season |
| Preferred active ingredients | Vitamin B3 2–5%, soothing textures, simple moisturizer | Same, plus Vitamin C in the morning and very infrequent gentle exfoliation |
| What worsens it most | Scrubs, brushes, very hot water, layering of acids | Unprotected UV exposure and picking at blemishes |
| Recommended reassessment point | 3 months (comparative photo) | 6 months (comparative photo) |
The "reassessment points" above are those we recommend in our educational protocols: they are methodological benchmarks, not durations of disappearance. The actual speed varies greatly from person to person, and no one can honestly give you a specific date.
The notion of phototype used here is the scale proposed by dermatologist Thomas B. Fitzpatrick in the Archives of Dermatology in 1988: it classifies skin types from I to VI according to their reaction to UV. It is not an aesthetic judgment; it is simply the tool that explains why the same imperfection leaves a red mark on one person and a brown mark on another.
Why some skin retains marks longer
For the same blemish, two faces do not react in the same way. Four factors explain most of the differences.
1. The intensity and duration of the blemish
The deeper, redder, more swollen, and longer a lesion has been, the more likely it is to leave a noticeable mark. This is the strongest reason why you shouldn't pick: manipulation prolongs and amplifies exactly what creates the mark.
2. The pigmentary reactivity of the epidermis
Darker skin tones have melanocytes that are more prone to respond to local aggression. This is an advantage in daily life against UV, but it also means that a simple blemish, insect bite, or friction can leave a visible brown deposit for several months. This is neither a defect nor a fragility: it is a characteristic that must be taken into account when choosing skincare products.
3. Cumulative UV exposure
A brown discoloration exposed without sun protection recharges with each outing. You are not progressing, you are treading water. This is the factor over which you have the most control, by far.
4. The general state of the skin barrier
An epidermis stripped by overly harsh cleansers, frequent scrubs, or a layering of active ingredients becomes perpetually uncomfortable and red. In this situation, each new blemish leaves a more visible mark. Restoring comfort — gentle cleanser, moisturizing cream, consistency — is therefore not a "bonus" step: it is the foundation. Cell renewal, the natural rhythm by which the epidermis replaces its surface cells, works better on comfortable skin than on irritated skin.
Four habits that make blemishes last
Before adding anything to your routine, eliminate these four habits. They alone can cancel out the effects of most treatments.
- Touching, squeezing, picking. The action that seems to shorten the problem actually prolongs it. It spreads the affected area and intensifies the discoloration left behind.
- Exfoliating harder and harder. Seeing a blemish persist tempts you to increase intensity: grainy scrubs, nightly acids, brushes. The result: red, sensitized skin that marks more easily with the next breakout. A gentle exfoliant, once or twice a week at most, is plenty.
- Skipping sun protection. This is the most costly mistake for dark marks. Without it, the rest of your efforts will be futile.
- Changing everything at once. Three new products in the same weekend, and you'll never know which one helps, which one irritates, and which one does nothing. Always make only one change at a time.
A fifth, more subtle habit is added: expecting results in one week. Post-blemish marks are part of the long-term biological process, one of months, not days.
The Academy's 90-day protocol
Here is the method we teach at the Academy. It is not spectacular, and that is intentional: its purpose is to provide, after three months, a clear answer to the question "does it work for me?". Note the start date in your phone.
The photo ritual, to be implemented first
Three photos, and only three: on Day 0, Day 30, and Day 90. To ensure they are comparable, four fixed rules:
- Same location: next to the same window, daylight, never bathroom lighting.
- Same time, within an hour, to capture the same light orientation.
- Same distance: approximately 30 cm, face forward then three-quarters right and left.
- No makeup, cleansing completed at least 20 minutes prior, no flash.
Days 0 to 14 — lay the foundation, add nothing new
For fifteen days, no new active ingredients. Stabilize the skin.
- Morning: rinse with lukewarm water or gentle cleanser, moisturizer suited to your skin type, then SPF 30 to 50.
- Evening: gentle cleanser (essential if wearing SPF or makeup), comforting moisturizer.
- Zero exfoliation, zero brushes, zero new serums, zero manipulation.
- Day 0 photo on the first day, and the two mirror tests recorded in writing.
Days 15 to 45 — one active ingredient, every day
Introduce vitamin B3, at 2 to 5%, in the morning, on clean skin, before moisturizer and SPF. It is the best-tolerated active ingredient in the repertoire, and the only one that works equally well for both red and brown marks.
- Always a tolerance test: three consecutive evenings in the crease of the elbow or behind the ear before applying to the face.
- No other changes during these 30 days, including moisturizer or cleanser.
- Day 30 photo at the end of the period.
Days 46 to 75 — a second lever, chosen according to your test
Only one of the two, never both in the same week.
- Brown mark (does not fade with pressure): add a vitamin C serum in the morning, every other day for the first week, then daily if well tolerated. Apply it before or alternating with the vitamin B3 depending on texture.
- Red mark (fades with pressure): do not add acid. Instead, reinforce comfort: a richer cream in the evening, and patience. If everything is well tolerated, a gentle exfoliation once a week, no more.
Days 76 to 90 — the honest assessment
Open Day 0 and Day 90 photos side-by-side on the same screen, at the same size. Then answer three questions, in writing.
- Is the complexion generally more even, the same, or less even than on Day 0?
- Is the comfort better? (tightness, underlying redness, sensations when cleansing)
- Have there been new blemishes, and if so, have they left marks as pronounced as before?
If the answer is "the same" for all three points after 90 days of real consistency, do not increase intensity: it's time to seek dermatological advice rather than buying one more product.
Active ingredients: what you can reasonably expect from them
This table does not rank active ingredients from best to worst. For each, it indicates the usual cosmetic concentration, time of day, introduction rhythm, and important precaution. The percentages are those commonly found in commercial skincare products; they rarely appear on the packaging but often in the product sheet.
| Active Ingredient | Usual Concentration | Time of Day | Starting Rhythm | Important Precaution |
|---|---|---|---|---|
| Vitamin B3 (Niacinamide) | 2 to 5% | Morning, possibly morning and evening | Daily from the start | Very well tolerated; above 10%, tingling is possible without additional benefit |
| Vitamin C (L-Ascorbic Acid) | 5 to 15% | Morning, under SPF | Every other day for 1 week, then daily | Degrades in light and air: opaque, sealed bottle, used within 3 months |
| Azelaic Acid (cosmetic formulations) | 5 to 10% | Evening | 3 evenings per week for 3 weeks, then daily | Frequent tingling at first; above these dosages, it falls into the medical domain, requiring prescription |
| AHA (Glycolic, Lactic Acid) | 5 to 10% | Evening | Once a week, twice maximum | Makes the skin more sensitive to the sun: SPF the next morning, non-negotiable |
| Retinol | 0.1 to 0.3% (face ceiling set at 0.3% by Regulation (EU) 2024/996) | Evening only | 2 evenings per week for 1 month, then +1 evening per month | Not recommended during pregnancy and breastfeeding; never on the same evening as an AHA when starting |
| Sun Protection | SPF 30 to 50+ | Morning, last step before makeup | Daily, 365 days a year | Reapply every 2 hours during prolonged exposure; this is the only truly decisive step for dark discolorations |
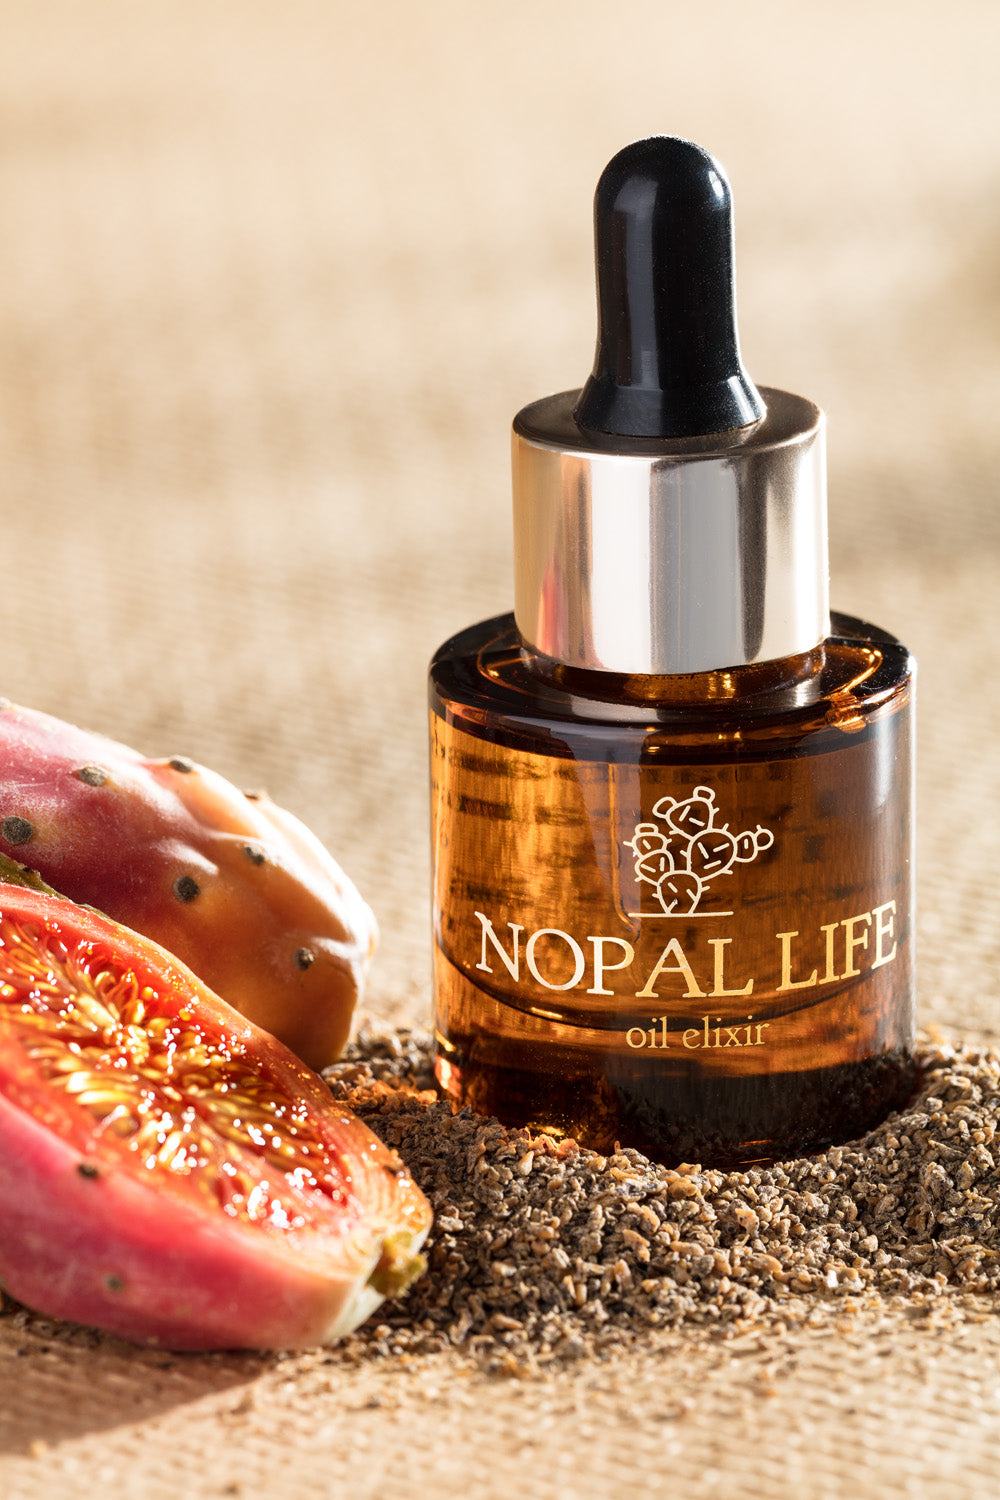
| Prickly Pear Seed Oil | Pure, 2 to 4 drops | Evening, at the very end of the routine | Evening, according to nourishing needs | Does not replace moisturizer or SPF; space out during active breakouts |
A word on this active ingredient, as it is the cornerstone of the protocol. A study published in the British Journal of Dermatology by Hakozaki and collaborators in 2002 evaluated a cosmetic formula with 5% vitamin B3 on the appearance of skin pigmentation, and described a reduction in the transfer of melanosomes to surface cells. This is an old and limited study, on a small sample size: it explains why this active ingredient is found in so many serums aimed at evening out skin tone, but it does not guarantee individual results. We mention it for what it is—a piece of context, not a promise.
To learn more about this active ingredient and its role in relation to the protective barrier, the Niacinamide reference sheet details its formulation and combinations.
Sun protection, the all-deciding step
If you only take away one line from this page, it should be this: for a dark mark, everything you apply in the morning is conditioned by what you put on top. Without daily sun protection, it will reappear as quickly as the rest of the program works—and you will wrongly conclude that "nothing works."
- Every day, not just in summer. UVA rays pass through clouds and windows: office near a window, car journeys, November terrace.
- As the last step of the morning routine, after moisturizer, before makeup.
- In real quantity. A pea-sized amount for the face, not a thin veil. Half of disappointments come from under-application.
- Chosen to be worn. A texture you hate will not be used. Fluid, tinted, mineral: the best one is the one you apply without thinking about it.
No skincare product can compensate for the absence of this step. Any vegetable oil, whatever it may be, is never sun protection—this is one of the most common and damaging confusions.
Where Prickly Pear Seed Oil fits in
On a topic like this, it would be easy—and dishonest—to present our signature oil as the answer. It is not. Here, precisely, is what it does and does not do in a real-world routine that leaves marks.
What it provides
Prickly pear seed oil is an evening finishing oil. Two to four drops of prickly pear oil, warmed between the palms and pressed onto the face after moisturizing, provide nourishment, suppleness, and a visible glow the next morning. For skin that has become dry or uncomfortable—which can happen quickly after using many acids to remove marks—it helps maintain comfort and makes daily life more pleasant. Comfortable skin is skin that you stop picking at: the indirect benefit is not insignificant.
What it does not do
- It does not act on the pigment of a brown mark. That is not its domain.
- It does not replace moisturizer, SPF, or the active ingredient in the protocol.
- It is not suitable during an active inflammatory breakout: on skin that produces a lot of sebum and has active blemishes, space it out or reserve it for dry areas, so as not to overload the skin.
For those with oily skin who fear a rich texture, jojoba oil offers a drier feel and a particular affinity with the surface film: it is often the most comfortable entry point to plant oils. Its profile is detailed in its entry in the Reference Guide.
Adapt according to your skin profile
- Oily or combination skin with imperfections: hydrate nonetheless, with fluid textures. The stripping logic maintains discomfort and underlying redness. Green clay masks can be used, but only occasionally, on the T-zone, once a week at most, never as a dry, cracked layer over the entire face.
- Dry skin: boost nourishment before introducing any acid. A dry epidermis exfoliated too early becomes reactive and shows more marks.
- Sensitive skin: stick to vitamin B3 alone for a long time. Introduce one active ingredient every six weeks, not every two, and systematically test in the crook of the elbow.
- Medium to dark skin: photoprotection takes precedence over everything else, and exfoliation must remain very cautious — sustained irritation can itself deposit pigment. The principle is simple: less aggression, more consistency.
- Mature skin with old marks: combine hydration, nourishment, antioxidants in the morning, and SPF. For marks that have been present for several years, the realistic goal is overall skin tone uniformity, not the disappearance of a specific mark.
If you are hesitant between two of these profiles, decide based on the written result of your two tests rather than the skin type you attribute to yourself: it is diascopy, and only diascopy, that determines the second lever introduced on D46. To delve deeper into each active ingredient mentioned here, the entries in the Ingredient Reference Guide detail their complete profile.
Reading the label: where the percentage is really hidden
The table above provides dosages. But you still need to know how to find them, as they are almost never on the bottle. Here's how to read packaging without being swayed by appearances.
- The INCI list is ordered in descending order down to 1%. Below this threshold, the order becomes free: what appears after the first preservative or the first fragrance is therefore, generally, present in very small quantities.
- A large name on the box is not a dosage. "Enriched with vitamin C" can mean 0.1% or 15%. Only the technical sheet, the leaflet, or customer service provides the exact figure.
- Spot the rank. If the star ingredient appears in twelfth position, after alcohol, thickeners, and colorants, the marketing claim is stronger than the formula.
- Beware of very long lists when you are looking for simplicity. For reactive skin, fifteen ingredients are often better than forty-five.
- Vocabulary is regulated. The European regulation on claims requires that what is stated be verifiable and fair. A formula that promises to erase or repair falls outside the cosmetic scope: this is a warning sign, not a guarantee of quality.
A final, often decisive, habit: note the opening date with a marker on the bottom of the bottle. Many disappointments attributed to a formula are actually due to a bottle that has been open for fourteen months, oxidized, and whose smell and color have changed without anyone noticing.
Three misconceptions to discard immediately
"A little lemon to lighten"
This is one of the most common, and riskiest, home remedies. Citrus fruits contain furanocoumarins, photosensitizing molecules: when applied and then exposed to the sun, they can trigger frank skin reactions and, ironically, leave much more durable discolorations than those one sought to fade. Lemon juice has no place on the face.
"Toothpaste dries out pimples"
It mainly dries out the healthy area around it, with its surfactants, abrasive agents, and mentholated flavors. The most common result is localized irritation — exactly the mechanism that prolongs residual discoloration. The shortcut costs more than it brings.
"It has to tingle to work"
No. A slight, brief sensation can accompany the introduction of certain active ingredients and dissipate within two to three weeks. A burning sensation, redness that persists for more than an hour, or flaking are not signs of effectiveness: they are stop signals. Individual tolerance always takes precedence over theory and what you may have read elsewhere.
Smartly concealing, while waiting
There is no contradiction between following a patient protocol and wanting to feel good tomorrow morning. Concealment is not giving up: it is often what allows one to last three months without succumbing to the temptation of aggressive treatment. A colorimetry principle is enough—a color is neutralized by its complementary color.
- Reddish area: a touch of green corrector, in a very thin layer, before foundation. Too much green gives a grayish appearance; always use less than you think.
- Brownish area: a peach or apricot corrector, one shade lighter than your skin tone, applied by dabbing and never rubbing.
- Order matters: moisturizer, photoprotection, then corrector, then light foundation. A corrector applied under a sticky base will migrate in three hours.
- In the evening, remove makeup thoroughly — this is the non-negotiable counterpart to daily concealment.
Finally, a word about how you perceive your reflection. What you see ten centimeters from the mirror, under direct lighting, no one else sees. Step back a meter: this is the actual distance of conversations, and it is at this distance that you should judge.
When to consult a dermatologist
Cosmetics have a scope, and recognizing it is part of a brand's seriousness. Make an appointment, without waiting 90 days, in these situations.
- The stretching test reveals a hollow or raised area: these are true scars, and only a doctor can explain the options to you.
- Outbreaks are continuous, painful, deep, or extend to the back and torso.
- A spot changes shape, color, contour, or grows: this is outside this scope and needs to be examined.
- The epidermis is persistently red, burning, or painful after using a skincare product.
- The emotional impact is significant. This is a perfectly legitimate reason to consult, and no one should have to justify it.
Salima's case
The situation
Salima, 27, with medium and combination skin. Her breakouts have become much less frequent over the past six months, but her cheeks still have about ten brown marks that she covers every morning. Convinced she has "scars," she buys a grain scrub, an exfoliating serum, a vitamin C, and an active emulsion in one month. She uses them all, every evening. After ten days, tightness appears, cleansing becomes irritating, and two new pimples have emerged. She doesn't apply sun protection, "because she doesn't get sunburned."
The NOPAL LIFE analysis
Three problems overlap. First, the diagnosis: with the diascopy test, her marks do not fade — these are pigmentary marks, not textured scars, and the stretching test confirms a perfectly flat surface. Second, the method: four products introduced simultaneously make any interpretation impossible. Finally, the foundation: the absence of photoprotection on a phototype that easily deposits pigment mechanically cancels the effect of everything she applies. Not burning in the sun does not mean not pigmenting.
The proposed adjustment
- Stop everything except the gentle cleanser and a moisturizer for 14 days, until comfort returns.
- Introduce an SPF 50 from the first morning. This is the only non-negotiable addition to the list.
- On D15, reintroduce vitamin B3 alone, in the morning, daily.
- On D46, reintroduce vitamin C in the morning, every other day for the first week. The grain scrub, however, is not reintroduced.
- Reserve a few drops of prickly pear seed oil for the cheeks, in the evening, only on days of tightness.
- Photos D0, D30, D90, same window, same time. Decision on D90, not before.
Salima went from using six products on the same evening to two for fifteen days, then to one added step by step. This is not deprivation: it is the condition to finally know which one works.
Your tracking sheet
Copy these lines into a notebook or phone note, and fill them in today. You will reread them on D30 and D90.
- Start date (D0):
- Diascopy test result: mark fades / does not fade / fades partially
- Stretching test result: flat skin / persistent relief
- Number of affected areas and location (cheeks, forehead, chin, jaw):
- My skin type and current condition:
- My morning SPF (brand, index, texture):
- The product I am suspending from today:
- The only active ingredient I will introduce on D15:
- Dates of the three photos: D0 · D30 · D90
- My reassessment date, noted in the agenda:
Decision phrase, to reread on days of doubt: "I choose based on my actual skin, not on fear, trends, or promises."
Frequently asked questions
How do I know if my mark is red or brown?
Press on it for five seconds with your index finger or the edge of a clear glass, then release. If it fades, the component is vascular; if it does not move, it is pigmentary. This result guides the choice of treatments, much more than the shade perceived with the naked eye.
How long does a mark remain visible?
No one can give you an honest date: it depends on the phototype, the intensity of the initial outbreak, UV exposure, and the consistency of the program. What can be set, however, is an evaluation appointment: 3 months for red marks, 6 months for brown marks, with comparative photos to support it.
Which active ingredient should I start with first?
Vitamin B3, at 2 to 5%, in the morning, every day. It is the best tolerated active ingredient, suitable for both families, and it combines easily with a moisturizer and photoprotection. Vitamin C or a gentle exfoliant only come afterwards, and never at the same time.
Does exfoliation make marks disappear faster?
Gentle and very infrequent exfoliation — once or twice a week at most — can help the skin texture appear more even. Beyond that, the effect reverses: the epidermis becomes irritated, red, and an irritated epidermis deposits pigment more easily. For residual redness in particular, increasing exfoliation is almost always counterproductive.
Do I really need to use SPF in winter?
Yes, if you have brown marks. UVA rays are present all year round, pass through clouds and windows, and are sufficient to recharge a pigmentary mark. Daily application of SPF 30 to 50, reapplied every two hours during prolonged exposure, is the key gesture that structures the entire approach.
Can a cosmetic product erase an acne scar?
No. If the stretching test shows a hollow or a raised area, the deep structure is involved and no cosmetic product can modify it. Treatments can improve skin tone and comfort; true scars should be discussed with a dermatologist. Beware of formulas that promise to erase, repair, or treat: the European regulation on cosmetic claims precisely frames this vocabulary.
Does prickly pear seed oil work on marks?
It does not act on pigment. Its place is elsewhere: two to four drops in the evening, as a finishing touch, for nourishment, suppleness, and the visible radiance of an epidermis that has become dry or uncomfortable — a frequent situation when multiple acids have been used. It complements a program; it is not its driving force, and it never replaces photoprotection.
Can a mark be covered with makeup during the protocol?
Yes, and that invalidates nothing. Only the order matters: moisturizer, photoprotection, then corrector — green on a reddish area, peach on a brownish area — and finally a light foundation. The only non-negotiable counterpart is serious makeup removal in the evening. Simply take photos on D0, D30, and D90 without makeup; otherwise, they won't be comparable.
Sources
- Fitzpatrick T. B., "The validity and practicality of sun-reactive skin types I through VI", Archives of Dermatology, 1988, vol. 124, n° 6 — phototype scale I to VI.
- Hakozaki T. et al., "The effect of niacinamide on reducing cutaneous pigmentation and suppression of melanosome transfer", British Journal of Dermatology, 2002, vol. 147, n° 1 — evaluation of a 5% vitamin B3 formula.
- Commission Regulation (EU) No 655/2013 establishing common criteria for the justification of claims used in relation to cosmetic products.
- Commission Regulation (EU) 2024/996 — regulation of retinol use in cosmetics, 0.3% maximum for face products.
Conclusion
Post-blemish marks are where many routines go awry: we no longer see the pimple, we see the mark, and we start piling up bottles against something we never took the time to identify. Yet, two ten-second tests are enough to know what it is, and a 90-day protocol to know if the chosen routine is worth continuing.
Our position is consistent: explain before selling, guide before recommending, and respect real skin rather than promising impossible perfection. A colored mark that takes months to fade is not a failure of your routine — it's the pace of life. The only thing you can truly control is the regularity of your actions and the consistency of your photoprotection.
The NOPAL LIFE Skin Academy offers informative and educational content. It does not replace medical advice, diagnosis, or dermatological consultation. In case of persistent skin problems, significant reactions, or doubts, consult a qualified health professional.
© NOPAL LIFE — Skin Academy. All rights reserved. Any reproduction, adaptation, translation, extraction, or reuse, even partial, is prohibited without prior written authorization.
Post-blemish marks: key benchmarks
Understanding post-blemish marks begins with a distinction: a flat discoloration on one hand, a textured scar on the other. The former falls under cosmetic routine and photoprotection; the latter, under a dermatologist's care. This page gathers useful benchmarks — skin, marks, acne, serum, spots — with an educational and non-medical approach.
Quick Glossary
- Post-blemish mark
- A red or brown discoloration left after a blemish has healed; the skin surface remains flat to the touch.
- Post-inflammatory erythema (PIE)
- A pinkish to purplish mark of vascular origin; it fades when the skin is pressed for a few seconds.
- Post-inflammatory hyperpigmentation (PIH)
- A brown mark due to local excess melanin; it does not fade under pressure and darkens with UV exposure.
- Diascopy
- An observation technique involving pressing the skin for five seconds to distinguish between a vascular and a pigmentary mark.
- Scars
- Changes in skin structure, with perceptible indentations or raised areas; these require dermatological advice, not cosmetics.
- Phototype
- A classification from I to VI describing the epidermis's reaction to UV rays; it partly explains why some skin tends to leave red marks and others brown.
- Blemishes
- Small visible irregularities (pimples, spots, marks) common on oily or combination skin.
- Serum
- A concentrated, fluid treatment applied before moisturizer to target a specific need: even skin tone, hydration, comfort.
- Niacinamide
- A form of vitamin B3 used at 2 to 5% in treatments for skin comfort and visible tone uniformity; well-tolerated by most skin types.
- Retinol
- A vitamin A derivative used at night to support the appearance of skin texture; it should be introduced very gradually and is capped at 0.3% for facial use.
- Spots
- Darker areas that make the face appear less even; brown marks are included in this category.
- Sun protection
- A treatment that helps protect the skin's appearance from UV rays; for brown discolorations, this is the most crucial daily step.
- Skin barrier
- The outer layer of the epidermis, composed of cells and lipids (ceramides, fatty acids); it helps the skin maintain its hydration and comfort against external aggressors.
- Cell renewal
- The natural rhythm by which the skin replaces its surface cells; it is linked to visible radiance and skin texture.
- Moisturizer
- A formula that combines humectants, emollients, and sometimes occlusives to help the skin remain supple and comfortable.
Also covered
This chapter also sheds light on: acne marks, blemish marks, skin tone uniformity, gentle exfoliation, finishing plant oils, and the limits of cosmetic claims.
Key points to remember
- Two ten-second tests — diascopy and stretching — tell you whether you're dealing with a red mark, a brown mark, or a textured scar.
- For a brown mark, daily SPF 30 to 50 is more crucial than any serum.
- Only one active ingredient at a time: vitamin B3 2 to 5% on D15, a second lever only on D46.
- Three comparable photos (D0, D30, D90) are better than daily mirror observation.
- A raised area upon the stretching test: stop buying skincare, make an appointment.
Educational cosmetic content, for informational purposes.
Connect what you've learned to your real skin with the NOPAL LIFE diagnostic.
Start my free diagnosticBack to the Academy